Monday, February 21, 2011

Home Management Notebook

During this period when I get to be happy homemaker, I'm trying to make the most of my time and start good habits that can last me a lifetime.

At some point (and some place) recently, I read about starting a "home management" notebook.  I love managing things, and I love notebooks, so of course I made one!


This was another one of those projects where I was determined to use ONLY what I already had. That way, I wouldn't go to Michael's and go crazy on the scrapbook aisle.

My husband has tons of notebooks left from grad school.


I just hot glued yellow toile onto it.  I kept wanting to doll up the front, but I reminded myself that this is supposed to be FUNCTIONAL, so too many embellishments would get in the way.


I visited The Graphics Fairy and just went to town!  She has pretty banners that I downloaded and typed my categories into.


I decided to make sections for monthly bills, expenditures, appointments, and garden (I like to keep track of when I plant what!).

I took dividers (I'm so glad we have a well-stocked home office) and scrapbook paper from my stash and set up my pages.


Look at these beautiful graphics I included from The Graphics Fairy.  They fit right in with my sections.


I could easily just grab an accordian file or spiral notebook to keep track of things, but where's the fun in that?


I do love being organized!


I'm linking up to the parties on my Blog Parties tab as well as:


Saturday, February 19, 2011

Decorating: Using the Unexpected

I'm a pretty traditional girl.  I don't have an eclectic sense of style, and I don't take many decorating risks.

But I do like to occassionally use the unexpected.  I try to make my home a little more interesting and a little more personalized by taking ordinary things and using them in ways that aren't quite as ordinary.


It's not odd to see a bowl of fruit or potpourri...

but what about a bowl of buttons?


Or a wreath in a frame?


Tulips in a mug?


You don't always see a basket on the wall. With a plate in it.


Or moss in a silver creamer.


Or a topiary in a teacup!


I don't have a big decorating budget or tons of design talent, so quirky touches have to be my bread and butter.  Thanks to all the bloggers out there who inspire me and my projects!

Wednesday, February 16, 2011

Handpainted Cottage Sign

I can't get enough of the handpainted-sign craze.


The fun thing about these is that you can make them say whatever you want.  For this one, I chose "Cottage."  Who doesn't want to live in a quaint little cottage, right?

I actually found this board at my house. No idea where it came from. I guess that's the kind of life I live.....


I sanded it down nice and smooth and painted it "warm white."  I printed out my letters in a font I liked, cut them out, and traced them on the board with a pencil, like so....


I also cut out some pretty scrapbook and Mod Podged each end of the board.


I used a tiny paint brush to slowly fill in the letters:


I used my finger to smear a little black paint on the edges to give it more character.


Welcome to the cottage!


P.S.  I'm linking up to the parties on my Blog Parties tab as well as these awesome sites:


Monday, February 14, 2011

Sweet Blue Bird

Hello, little blue bird!


I LOVE those little wooden craft plaques you can get at Michael's or Hobby Lobby for 99 cents.  They are so fun to play around with!  So cheap and so versatile.


This one got a coat of blue, then Weathered Wood crackle medium, then a snowflake white, then a clear glaze.


I used a cute antique bird cookie cutter to cut my bird out of scrapbook paper.  Then I Mod Podged him (or her?) on the plaque.


Maybe my little bird is a sign of Spring!


I'm linking this up to


To see where else I party, click the Blog Parties tab!

Happy Valentine's Day

I'm really not a sentimental girl.

Really!

But it's hard not to feel a wee bit Valentine-y when I look at this picture of my husband and me the day after we were engaged.


There's actually not a whole lot of photos of us pre-marriage....after all, we had only been dating for five months when we got engaged!


I'm really not a "lovey" girl.  I don't like romantic comedies or love songs.  But here I am, on my wedding day, with my husband, less than one year after we'd first met.


When it was time to leave the church, I found that it was not an easy task waving goodbye to your whole family.  I could not have done it for just anyone.


Here we are in Costa Rica on our honeymoon....a huge step for me!  My first time out of the country, and my first trip as a "married lady."  I could have only done that with someone I truly trusted and loved.


I have to admit, I'm not the kind of girl who finds it easy to fall in love.

But I'm glad I did.

Happy Valentine's Day!

Sunday, February 13, 2011

I Love My Online Friends--A Blog Hop!


Do you love your online friends?

The great thing about blogging is that I've been able to meet and be inspired by so many people that I otherwise would not have had the chance to meet! 

Since I love sharing creativity and meeting new people, I'm always interested in making new online friends!

Marie from The Things We Find Inside is hosting a unique blog hop called "I Love My Online Friends."  Per Marie, here are the rules:

 
1. Follow the host (me) and the guest hosts on GFC. For this week, we are the number 1, 2 and 3 spots on the linky. (We will follow back.) Leave a comment to let us know.

2. Follow as many people as you can and be sure to let them know that you are from the 'I love my Online Friends Monday Hop'. 

3. You are not required to, but it will be great if you could grab our button and make a post about this hop. The more people that see this hop, the more blogs for us to visit and the more followers we gain. 


4. Every week I will pick one person to 'Guest Host' the hop with me. If you would like to be considered for the guest host position, all you need to do is grab our button, write a post about the hop and follow me on GFC. Leave a comment under this post to let me know if you are interested in guest hosting.


Join me as I join in the fun and meet new friends!


Friday, February 11, 2011

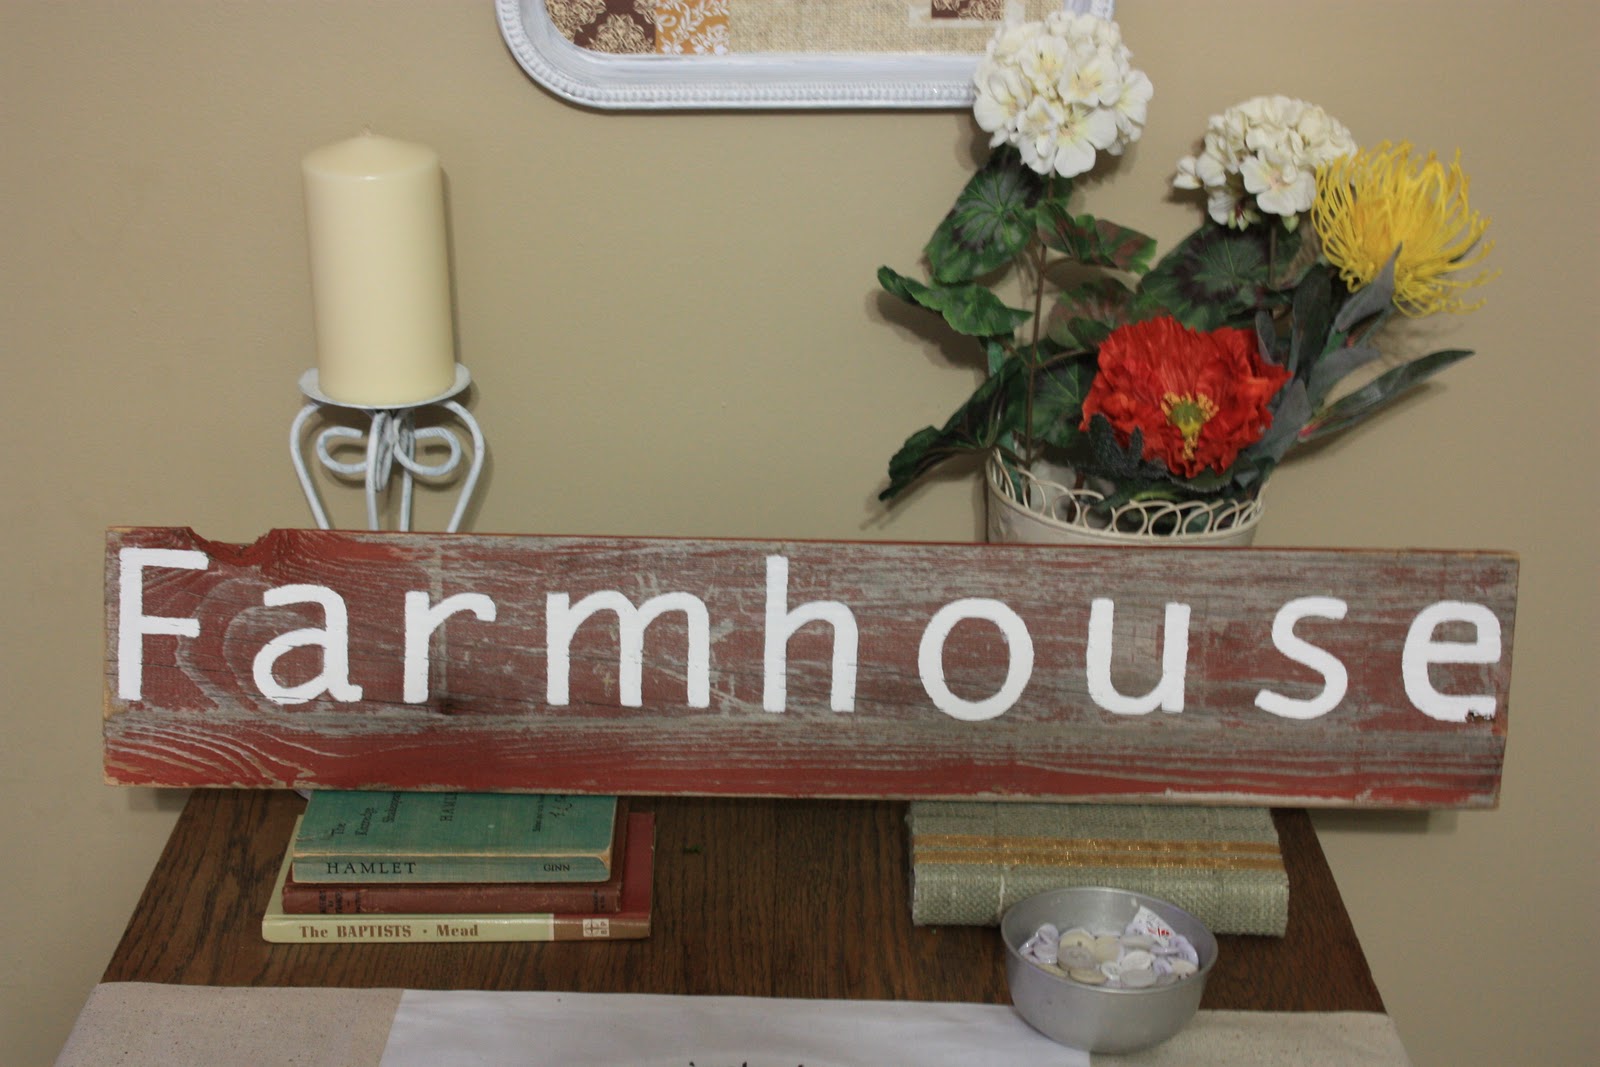
Reclaimed Wood Farmhouse Sign

Aren't there so many pretty handpainted sign projects out there?  I couldn't help but want to get in on it too!

Here is my rustic farmhouse sign....


When I was in Georgia over Christmas, I was able to salvage some wood from one of our old barns that is being renovated.  You can see it here!


The wood was painted red but you can still see the gorgeous grain.  It's already aged to perfection.


It was, however, a little too long, so I got out my NEW SAW (I'm so proud to officially own my very own saw), and took care of that.  Now I have another piece for a future project.


Since my heart will always be on the farm and this wood came from a farm, I thought it was only appropriate to paint "Farmhouse" on my sign.  I know there are better techniques out there for doing this, but this was my method: print out the words in Microsoft Word, placed them in the right position, like so...


Then I cut them out completely and sort of carved around each one to give myself an outline to paint in the letters.
It actually took quite a while to neatly and completely fill in the letters, but it was so worth it!


The look of the wood makes the sign so unique.


Now I have a sweet remembrance of home.


P.S. I'm linking this up to Sunday Showcase!  AND, Debbiedoo's awesome Newbie Party!  For the others parties I link to, see my blog parties tab!
Related Posts with Thumbnails